
How to map Entity, Sender id and Template in sms panel –
Step 1 – How to map Entity –
Whenever you have a new client, whose “DLT registration” is done but his “entity” is not mapped in his sms panel.
- You Need to open client system and login to his sms panel.
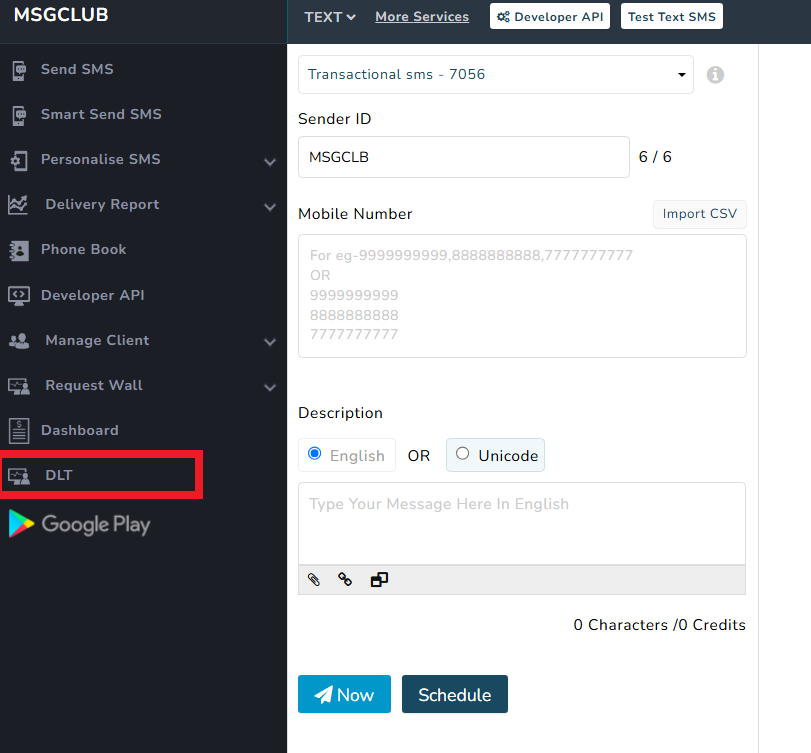
Step 2 – Click on DLT option –
1- Once you click on the DLT option so a page will open where you can check this detail –
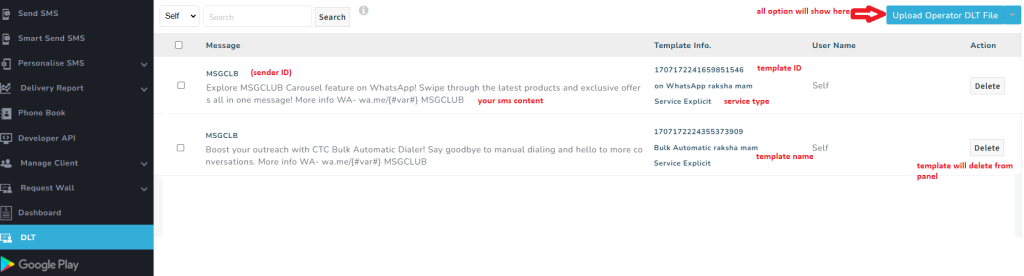
Message
** Sender id – On every template you will see a sender id , It refer that the template is mappend with which sender id –
If you have 2 sender id so you need to map the template 2 times, it will show in single line –
** Sms Content – At the down side of sender id you can check your sms content
Template Info
** Template ID – Here you can check your template ID. every template have there unique template Id , You can find the Id in DLT panel –
** Template name- Next option you can check your template name , You can type any thing while you upload the data in sms panel, it is for your knowledge only
** service type – in the service type you can find the template approval type like-
service implicit , service explicit , promotion etc
Username –
**here you can check who upload the template in your account –
Action –
** Delete – You can delete the template in the section , this template will delete from the panel
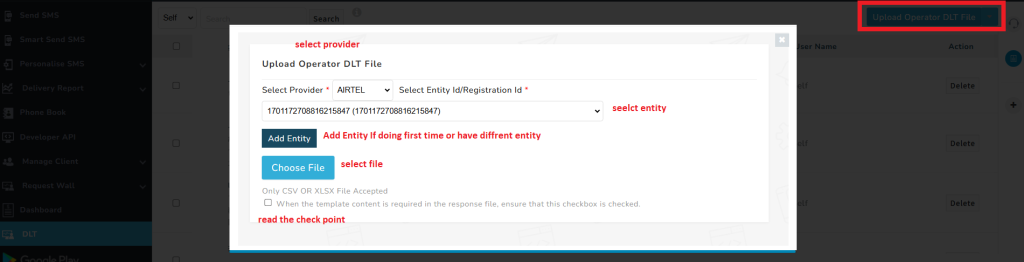
Step 3 – How to upload DLT and Template detail by provider download file –
To upload provider file in the sms panel –
>> please seelct Upload Operater DLT file
>> A form will open where you need to select provider, Entity, If already add in the panel –
NOTE – If you mapping first time so you can add DLT By click on Add Entity option –
Choose File – From this option you can upload your file
>> Check on check box If you want response with sms content
** Upload multiple entity template-
>> from this option you can upload multiple entity and template in the sms panel –
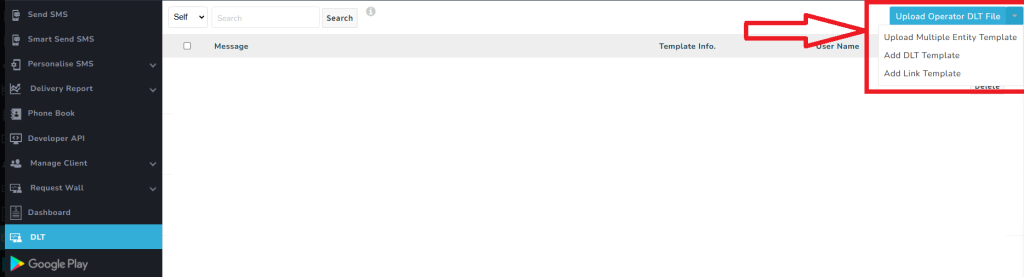
>> A pop up will where you can download the sample of the file and upload the template
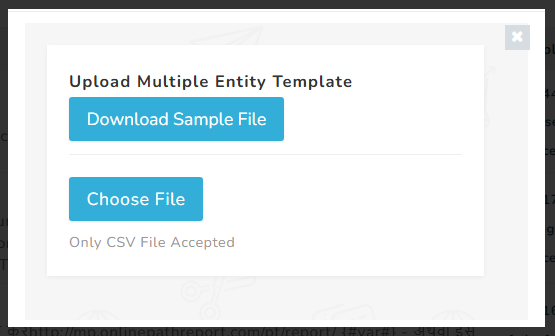
> You can download the “sample file” click on “download sample file” for example.

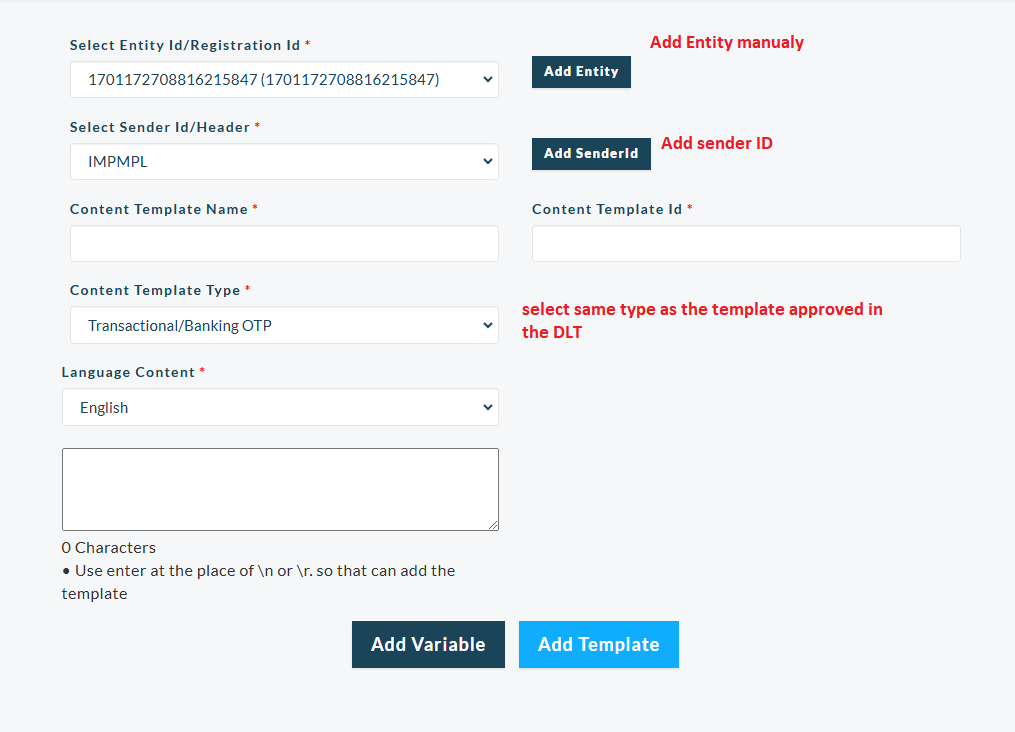
** Add DLT Template – From this option you can manualy upload the DLT template and add entity as well

>> when you click on the “Add DLT template“ A page will open where you need to add the detail –
>> You can select entity from dropdown or add Entity manualy
>> You can select sender Id from dropdown or add Approved sender Id manualy
>> Template name – Write template Name as you want for your information
>> Template Id – Add approved template , template ID
>> select exact template type from the DLT provider
>> seelct language and paste approved template
>> click on add template- so your template will be added in your sms panel
How to mapping DLT option
New flow video