The Manage Agent option is crucial for ensuring proper call distribution and response across different departments. This feature helps to allocate calls efficiently to agents in departments such as Sales, Support, IT, and HR. By managing agents, you ensure smooth operations and improve the customer experience.
Steps to Manage and Add Agents
1. Logging into the Panel
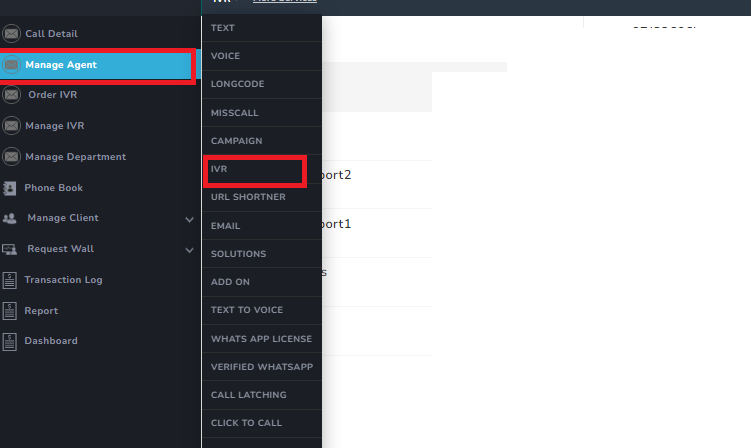
- Locate and click on the Manage Agent option on the left-hand menu.
- Login to the IVR panel using your User ID and Password.
- Once logged in, navigate to the IVR section.
2. Viewing and Editing Agent Details
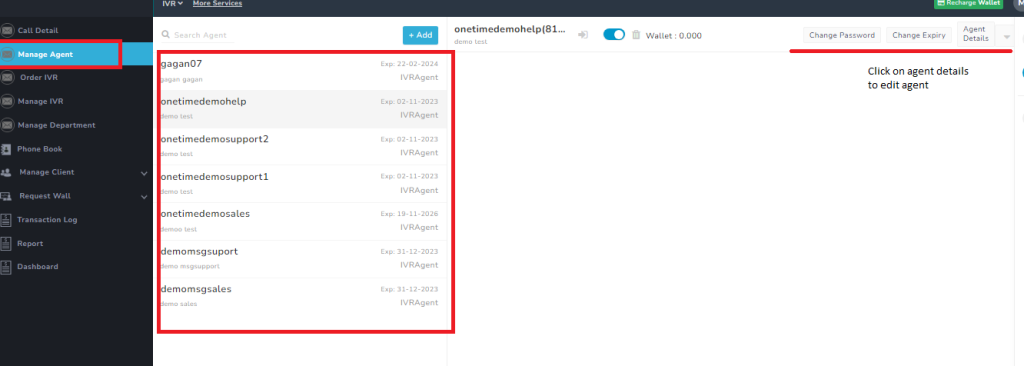
- After clicking Manage Agent, a page will display the list of all agents added to the system.
- You can edit an agent’s details by selecting the agent and clicking on the Agent Details option on the right-hand side.
Available Options for Agent Management:
- Change Password
- This option allows you to reset the agent’s account password.
- Change Expiry
- This option lets you update or modify the expiry date of the agent’s account.
Editing Agent Details:
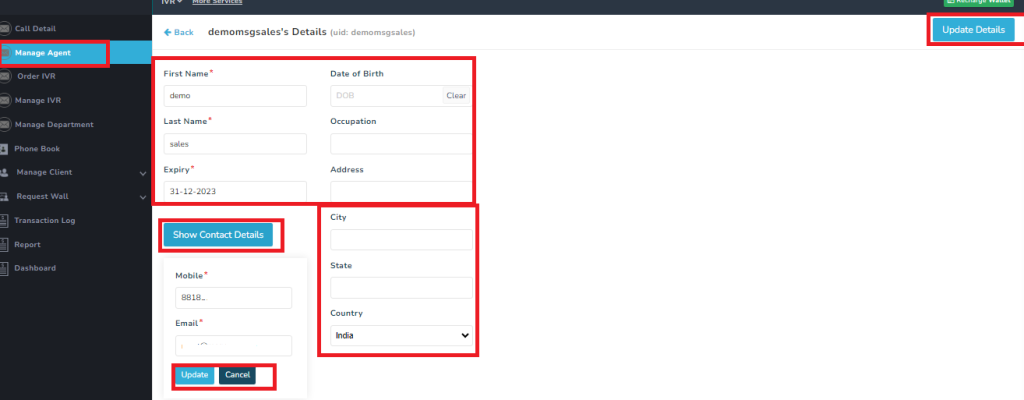
- Click Agent Details, and a new page will open.
- Update the agent’s details as required.
- If needed, click Show Contact Details to reveal:
- Mobile: Enter or update the agent’s mobile number.
- Email: Enter or update the agent’s email address.
- Click the Update button below the email field to save changes.
- Finally, click the Final Update button at the top-right corner to confirm all changes.
3. Adding a New Agent
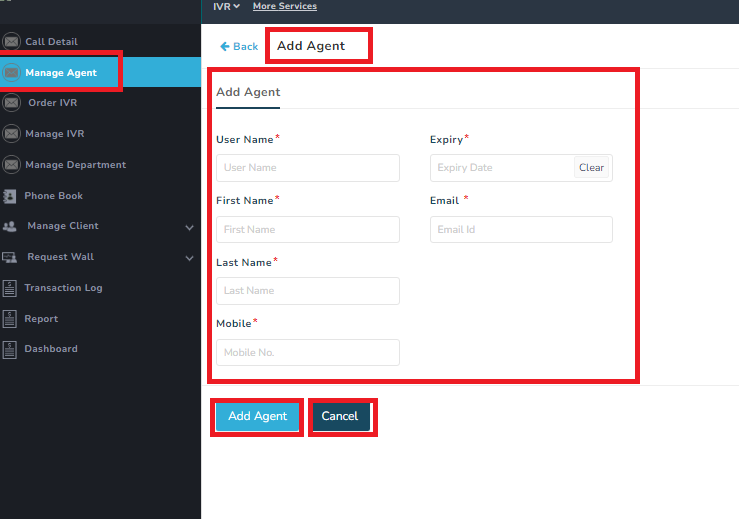
- Click on the Add Agent button located at the top of the page.
- A form will appear where you need to enter the following details:
- First Name
- Last Name
- Mobile Number
- Email (optional but recommended)
- Once all details are filled, click Add Agent.
- The newly added agent’s name will appear on the main page.
Enabling or Deleting Agents:
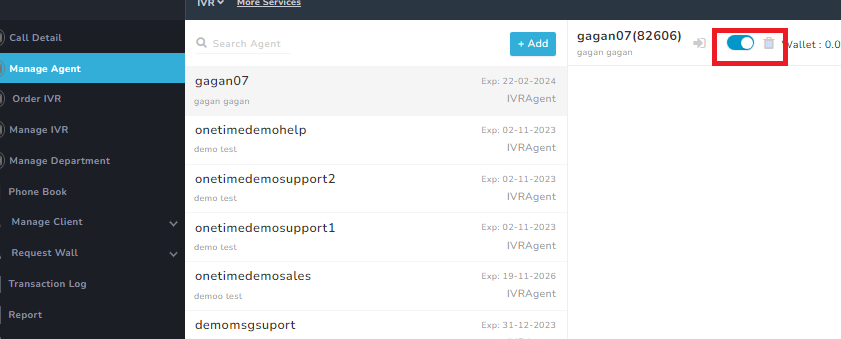
- To enable the agent for call handling, use the Enable option available on the main page.
- If you wish to remove an agent, use the Delete option.
THATS ALL FOR THE MANAGE AGENT OPTION>> HOPE IT WAS EASY TO UNDERSTAND THE OPTION….
