#Draft uploaded file
Navigating to Draft Upload
To send personalized emails to a list of contacts, you first need to upload a CSV file containing email addresses. Follow these steps:
- Go to SMS Panel
Navigate to Email Service > Personalize Email > Draft Upload File. - Upload CSV File
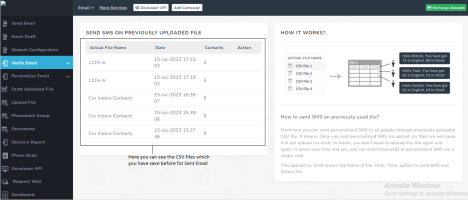
When you click on Draft Upload File, a page will open for selecting the CSV file that you previously uploaded as a draft in the panel.
Draft Upload File Overview
Upon uploading a CSV file, you will see the following details:
- Actual File Name: The name of the CSV file you uploaded earlier.
- Date: The date and time when the file was uploaded to the SMS panel.
- Contacts: The number of email addresses in the uploaded CSV file.
- Actions: Options for further processing the file (Send SMS, Download File, Delete File).
- Send SMS– You click on this option then there will be a new window open.

Actions Available for Uploaded Files
- Send SMS:
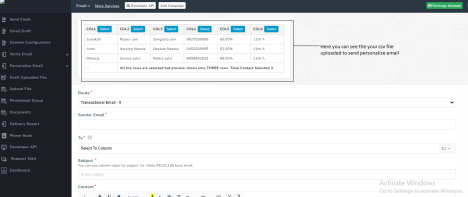
Click on this option to send personalized emails to the contacts listed in the uploaded CSV. You’ll need to specify:- Route: Select the route from which the emails will be sent.
- Sender ID: Enter the sender’s email address or domain.
- Subject: Specify the email subject.
- Email Content: Write or paste the email content.
- Attach Document (if necessary): Upload any documents to send along with the email.
- Download File:
Clicking this option will download the uploaded CSV file to your system.

- Delete File:
This option allows you to delete the uploaded CSV file from the panel.

2. Upload a CSV File for Email Personalization
If you have customer data stored in a CSV file, you can upload it into the system to send personalized emails.
- Choose File:
Click on Choose File to select the CSV file from your system.

File Upload Confirmation:
After selecting the file, click Open. A notification will confirm that your file has been uploaded successfully.
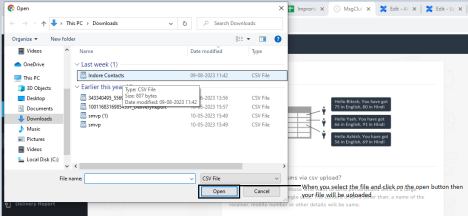
When you click on the open button the notification will be shown your file will be uploaded successfully.

And when you got the status, your selected file will be uploaded to send personalize emails.
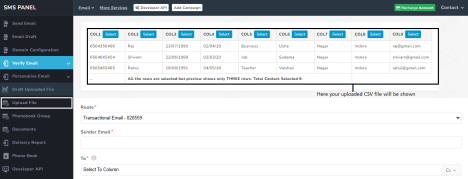
After uploaded CSV file you have to select Route for sending personalize emails, which route you will selected emails will be sent from that specific route.

Then you have to insert the sender email or domain from which you want to send emails to your target audience.

Inserting the Sender ID, you have to select Column of Email IDs, this column will be visible in uploaded CSV you just have to select column number which contains customers email IDs.
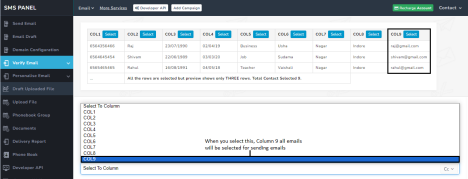
Then you have to insert the Subject if the Email which you want to send to the customers.

Inserting the subject, you have to insert content of email which you want to sent to the customers. You can Write the content here and if you have any customize email to send then you can simply copy or paste here for Send.

If you want to send any type of document to your customers and target audience, with the email so you can select the ‘Document’ for sending in email.
You can also able to select the column of the document, for sending personalized emails with a document to each customer. In the “Document Column“ you select the Name Column, Number column, etc. Which column you select email document will sent with that personalized information.

If you want to attach any file from your system in email for sent to the customer then you to click on Attach file button.

When You click on the “Attach File“ button then, a new window will open for select file from your system.
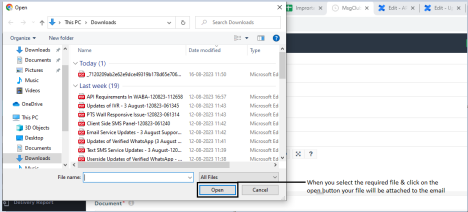
For sending email you have just simply click on the “Send” to send emails to the customers or your target audience.

3. Using Phonebook Groups for Sending Emails
You can send personalized emails to contacts in your phonebook groups directly from the Phonebook Group section.
Accessing Phonebook Group
- Go to Email Service > Personalize Email > Phonebook Group.
- Here, you can view the groups of contacts you’ve created in the phonebook.

Here you can see the groups which you have created in the phonebook, from here you can send emails to the already existing contact in phonebook groups.
Group Overview
For each group, you will see:
- Group Name: The name of the group.
- Contacts: The number of contacts in the group.
- Actions: Options to send emails to the group.

When you click on this button there will be new page will open with uploaded group for sending emails.

When group uploaded for sending email, you have to select Route for sending personalize emails, which route you will selected emails will be sent from that specific route.

Then you have to insert the sender email or domain from which you want to send emails to your target audience.

Inserting the Sender ID, you have to select Column of Email IDs, this column will be visible in uploaded CSV you just have to select column number which contains customers email IDs.

Then you have to insert the Subject if the Email which you want to send to the customers.

Inserting the subject, you have to insert content of email which you want to sent to the customers. You can Write the content here and if you have any customize email to send then you can simply copy or paste here for Send.

If you want to send any type of document to your customers and target audience, with the email so you can select the ‘Document’ for sending in email.
You can also able to select the column of the document, for sending personalized emails with a document to each customer. In the “Document Column“ you select the Name Column, Number column, etc. Which column you select email document will sent with that personalized information.

If you want to attach any file from your system in email for sent to the customer then you to click on Attach file button.

When You click on the “Attach File“ button then, a new window will open for select file from your system.
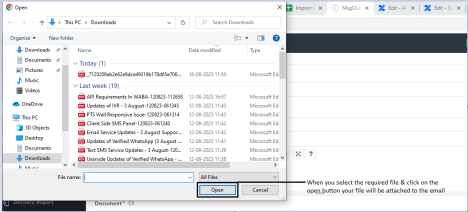
For sending email you have just simply click on the “Send” to send emails to the customers or your target audience.

How to use documet in email
In the “Document“ section you can upload the document file for sending with email to the customers or your target audience.
SMS Panel >> Email Service>> Personalize Email >> Document
When you select the option “Document“ there will be a page open of documents and from there you can upload a document from the “Add Document“ button.
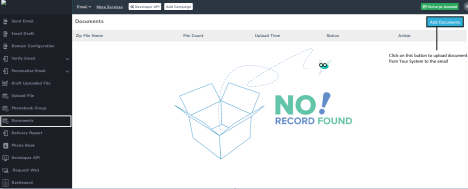
When you click on the “Add Document“ button then there will options will be open to select the document file from your system for sent with email.

- File Name– First you have to insert the name of the document file that you want to send to the customers or target Audience.
- Upload zip File– When you click on this button there will be a popup window will open for selecting the file from your system.
Note– SMS Panel Allows Document file formats in zip file application/pdf. And max allowed size for each file is 200MB.
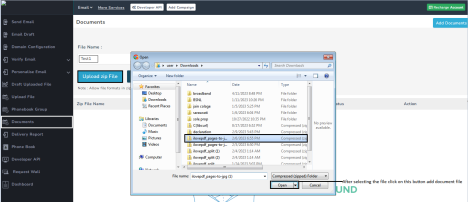
When you select the document zip file from your system and click on the ‘Open’ button, your file document file will be added to the SMS panel.
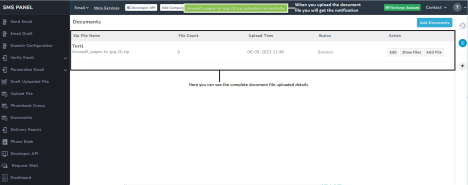
When your file is uploaded you will get the notification/status of ‘FileName.Format uploaded successfully’.
Zip File Name– Here you can see the ‘File Name’ which was given at the time uploaded document zip file, and the file actual name and format which you uploaded from your system.
File Count– Here you can see the counts of the file.
Upload Time– Here you can see the specific date and time of the uploaded document file.
Status– Here you can see the status of the uploaded document file like upload file was successful or not.
Action– When the file is uploaded then in the action section you can see the 3 different buttons for action.
- Edit- From the ‘Edit’ button you can edit the name of the document file that you were given at the time of adding the file.

Save- You have to click on the ‘save’ button after editing the file name to save the changes.
Cancel – If you want to cancel the request of edit file name then click on the ‘Cancel’ button
- Show Files- When you Click on this option then all files will be visible that you have added.

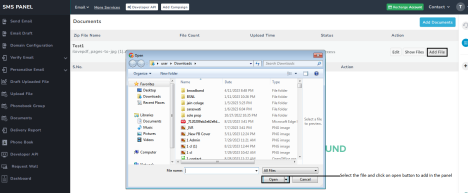
- Add Files- When you click on this button there will be a popup window open for selecting the file from your system.
