1. Login to Your Panel
- First, log in to your account panel.
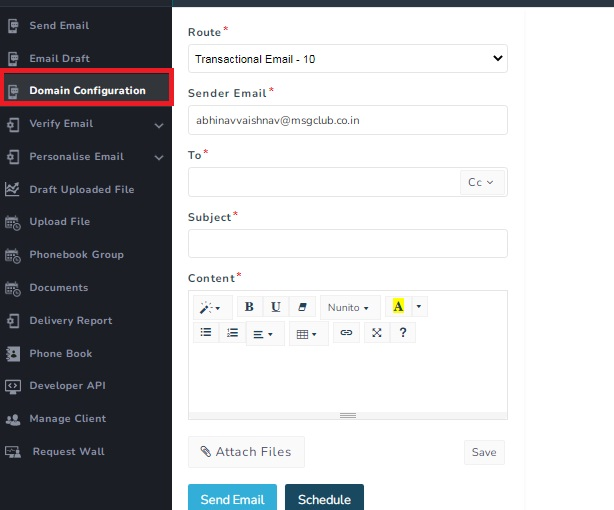
2. Navigate to Domain Configuration
- On the left-hand side of the panel, locate the Domain Configuration option.
- Click on the button to open the domain configuration section.

3. Add a New Configuration
- In the domain configuration section, click on the Add New Configuration button.
- A form will open where you need to enter the required details.

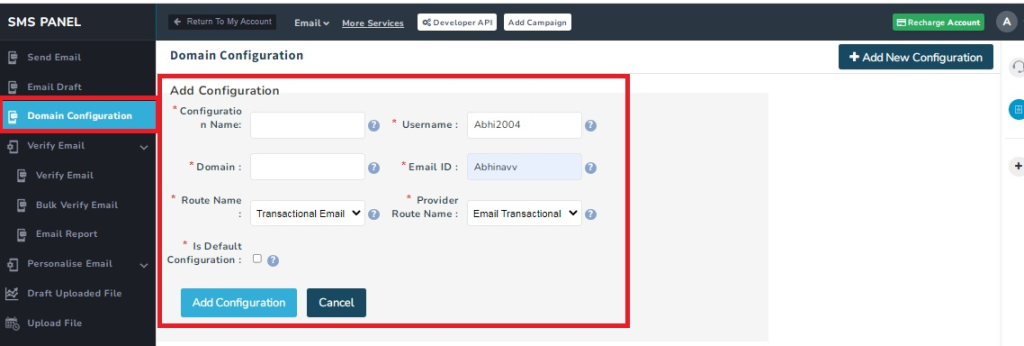
4. Fill Out the Configuration Form
- Complete the fields as follows:
- Configuration Name: Enter a name of your choice to identify the configuration.
- Username: This field will be automatically populated with your username.
- Domain: Enter the domain you wish to add.
- Email ID: Provide the email address associated with the domain.
- Route Name: Select the appropriate route name from the dropdown list.
- Provider Route Name: Select the current email provider’s route name.
- Is Default Configuration: Enable this option if you want this configuration to be the default for email transactions.

5. Submit the Form
- Once you’ve completed the form, click on the Add Configuration button (as shown in the image below).
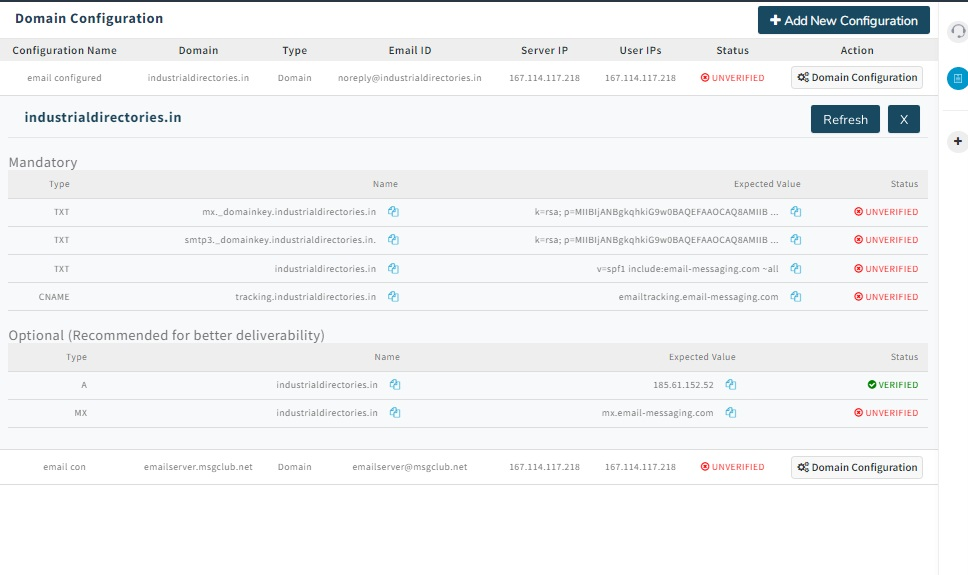
- After submission, the configuration will appear in the panel with the status Unverified.

Domain Configuration Settings
Once you have added the domain, you need to configure various DNS records.
1. Access the Domain Configuration Settings
- Click on the Domain Configuration Setting button to view and configure your domain settings.
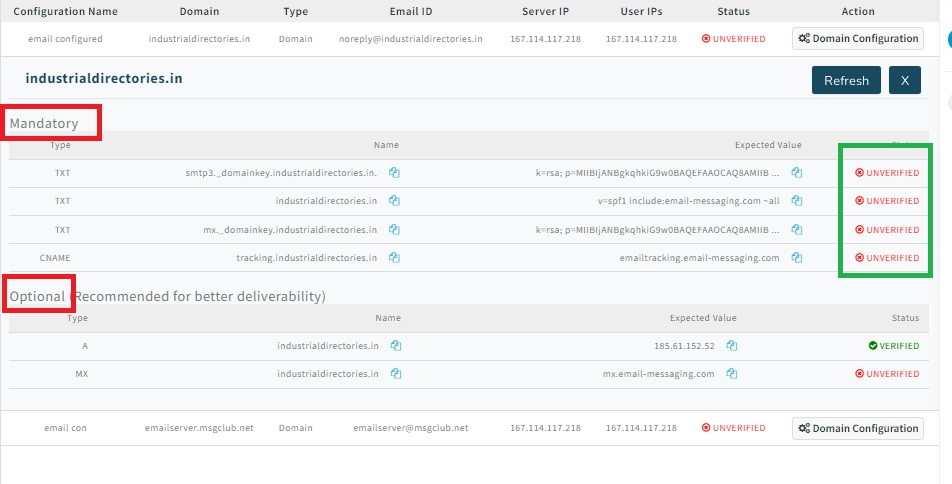
2. Required and Optional DNS Records
- The following fields will be displayed for configuration:
- TXT Records: Mandatory – You must enter the TXT record for domain verification.
- CNAME Records: Mandatory – Enter the CNAME record for domain configuration.
- MX Records: Optional – You can add MX records if needed for email routing.
- A Records: Optional – Add A records if necessary for your domain setup.

3. Map DNS Records in cPanel
- Log in to your cPanel where your domain is hosted.
- Map the required records (TXT, CNAME, MX, A) to your cPanel DNS settings as per the details provided.
Domain Verification Process
1. Wait for Domain Verification
- After adding the DNS records in your cPanel, it may take approximately 3-4 hours for the domain to be verified.
- Once the verification process is complete, the domain status will update to Verified on the domain configuration page.

2. Domain Status
- After successful verification by your email provider, the status of the domain will change from Unverified to Verified.
- You can now send emails from your panel using the verified domain.
Support
If you have any queries or encounter any issues during the domain configuration or email verification process, feel free to contact support for assistance.
